Welcome to the Kargi Kala Kendra Frequently Asked Questions Page. Bharatanatyam journey is a long and we hope to bring a little clarity. Here are a few of the most common questions. We are constantly adding to this page, so if you have any additional questions, please email us at KargiKalaKendra@gmail.com and we will get back to you promptly.
- When can my child start ?
Truthfully, this depends on the child. Holding the proper hastas and the half sitting position requires self-control and adequate muscle development so much of this depends on your specific child’s physical and emotional maturity. Some children can start as young as 5, but in our experience, we have had the most success with children 6 years old. We find that at this age, they are able to concentrate for the full class and are able to pick up steps quickly. However, even at this age, parents must be willing to follow up with their child and help them practice.
+ Is my child too old ?
No, you are never too old to start learning Bharatanatyam. While we recommend starting at a young age so you can build your endurance and muscle early, those skills can be learned at any age. We have many students who have started in their teens and they do an exceptional job. At that age, they are more self-motivated and disciplined and progress through the material very quickly.
+ My child has already learned at a previous studio, will they have to start over?
India is a very diverse country and Bharatanatyam is no exception. There are numerous styles of Bharatanatyam and within those styles, every teacher follows a different curriculum and has their own style. In saying that, most of the styles tend to be very similar and in a few months, we are able to fill in the missing pieces. It will take dedication from the student to be motivated to work on their corrections and make the appropriate changes.
+ How much should my child practice ?
Like anything in life, you get from Bharatanatyam what you put into it. The more you are willing to practice at home, the more rewarding Bharatanatyam will be. I’ve always believed that 80% of the progress is made at home and not practicing will put your student at a huge disadvantage. At a young age, it might seem unnecessary to have your child practice their atavus daily, but in doing that, you are building their endurance and building strong habits. You are instilling in your child early on that they have to work hard and when they reach their difficult dances, they will be willing to put in the effort.
+ What is a Salangai Pooja & do i need it ?
Salangai, sometimes called Gungurus, is the anklet bells work on the dancer to enhance the beats. A Salangai Pooja is simply a pooja for your Salangai. Every dancer has a pooja before the first time they will wear the Salagai. This signifies the step from a beginner dancer to an intermediate dancer. The Salangai Pooja is performed after students complete the entire attavu set. Salangai poojas can be as simple as coming to your guru’s house on an auspicious day, taking their blessings and performing the pooja with them. Some people, however, prefer to do this on a more grand scale where the pooja is part of a Bharatanatyam performance consisting of 4-6 dances. We find Salangai Poojas are especially great for younger students as they find the experience very motivating and exciting. Salangai Poojas can be performed solo or in a group. In our experience, we have found that group Salangai Poojas are not only easier for the parents as they can split the cost but also more fun for the children as they have friends practice with. We have even found that children perform better in a group because they have the confidence from their peers. For older children, we prefer to forgo a Salangai pooja performance and instead focus towards their arangatram.
+ What is an Arangetram & how long will it take ?
An Arangatram is equivalent to receiving your high school diploma. It signifies that the student is proficient in all aspects of Bharatanatyam. Like high school, however, this doesn’t signify the end. There is so much to be learned and even after the arangetram, students are encouraged to still attend classes and continue learning. The timeline is very personal and varies student to student. The amount of time it takes is mostly dependent on the amount of effort they put in outside of class but also dependent on their natural ability and how quickly they can pick-up steps. On average, we say around 6-7 years before the students are ready for their arangatram and an additional year to plan and complete all the dances.
+ What makeup should my child wear ?
Every dancer does their makeup slightly differently and it varies on the specific program. For young girls, we recommend powder, eyeliner, mascara and a red lipstick. As the girls get older, or for stage performances with harsh lighting, we recommend adding a foundation as well. Here is a comprehensive list of all the makeup steps and the products we recommend.
-
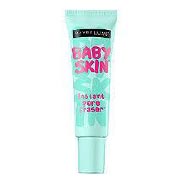
PRIMER
- The first step in makeup application. Primer smooths the skin and fills in any pores, it is not required but highly recommended if you have uneven skin texture. Apply with hands to the skin like a moisturizer, focus on the nose and chin.
- No color selection.
- Maybelline Baby skin.
-
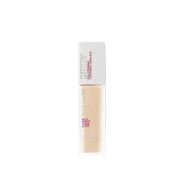
FOUNDATION
- Use a sponge to apply the foundation. Use a tapping motion opposed to a rubbing motion. Apply a thin layer to the entire face and blend down to the neck. Apply another layer if the skin color is not looking even.
- Choose a color that matches the neck. If you cannot find an exact match, a lighter color is preferred to darker.
- Maybelline Baby skin.
-
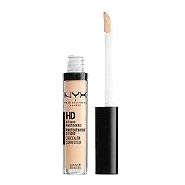
CONCEALER
- Use the applicator and apply the concealer underneath the eyes, on the chin, bridge of the nose and the center of the forehead. Blend out using a sponge. It’s very important you use tapping motion to blend the foundation, of you run, you will disturb the foundation and concealer underneath it.
- Choose a color that is one shade lighter than your foundation.
-
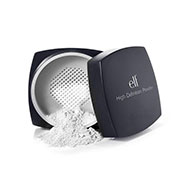
LOOSE POWDER
- Loose powder is on top of the foundation using a sponge. Press a thick layer of the white powder on top of the areas the concealer was applied. This helps set the concealer. Let this powder sit on the skin for 3-5 minutes.
- White/translucent powder.
-
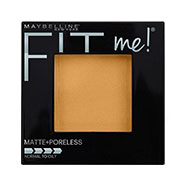
POWDER COMPACT
- This powder sets the rest of the face. This keeps the foundation in place and stops the makeup from sweating off. Apply a layer of powder over the entire skin. You should also brush off the excess loose powder during this step. The powder compact also helps keep the skin matte and hide uneven skin texture.
- Chose a shade that matches your foundation shade. A powder that is more yellow or orange works great.
- Maybelline fit me matte and poreless powder.
-
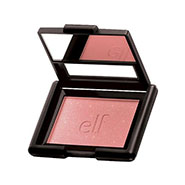
BLUSH
- Use a brush to apply the blush on to the apples of the cheeks. Make sure you blend it up to the temples as well. Do not bring it past the smile lines.
- We recommend more red and mauve tones. For the elf studio blush, we recommend the color “mellow maybe”.
- Elf studio blush.
-
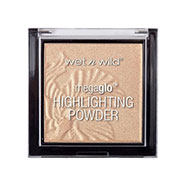
HIGHLIGHTER (optional)
- Highlighter is applied to the cheekbones and the bridge of the nose. You can also apply highlighter in the inner corner and the brow bone. It gives a nice shimmer to the otherwise matte face. Highlighter is not required but looks great on stage and photos.
- We recommend golden and peachy tones. In the wet and wild one, we recommend the “Golden Flower Crown” color.
- Wet n wild megaglo highlighter.
-
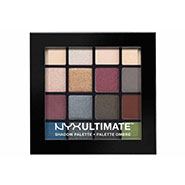
EYESHADOW
- We recommend a red color applied all over the lids, most concentrated at the center of the eyelids. We also recommend a gold color in the on top. Eyeshadow is best applied using an eyeshadow brush, but you can also use the applicator.
- We recommend having at least one maroon color and one gold color, however having more colors can let you do more customized looks for each costume. We recommend buying an eyeshadow palette with both matte colors and symmetry so you can do a variety of looks.
- NYX Ultimate shadow palette.
-
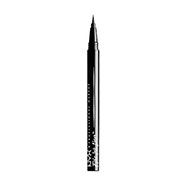
Liquid Eyeliner
- Eyeliner is applied in a wing shape to the eyelids. Apply liquid eyeliner to the top and bottom eyelids.
- Any black color.
- NYX epic ink liner.
-
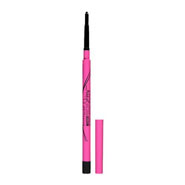
Tight liner (optional)
- A tight liger is applied to the upper and lower water lines. This darkens and eyes and helps fill in any gaps the liquid eyeliner didn’t get.
- Any black color.
- Maybelline Master Precise skinny eyeliner.
-
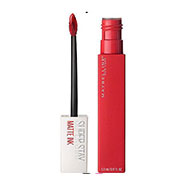
Liquid LIpstick
- Liquid lipstick is applied before the traditional lipstick. It stays on much better and is not as creamy so won't slide off if you eat or drink something. They also offer much more precise application than a traditional lipstick.
- Any red or maroon color. We recommend red colors for lighter skin tones and maroon for deeper skin tones. If you choose the maybelline one, we recommend the color “Pioneer” as it works great for all skin tones.
-
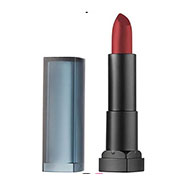
LIpstick (optional)
- we use a creamy lipstick on top of a liquid lipstick. This makes the liquid lipstick more comfortable to wear as it can feel dry. Using a traditional lipstick on top also gives a brighter more brilliant red color to the lips and makes for even more staying power.
- Any red color. We like the Maybelline color sensational powder matte lipstick in the color “Cruel Ruby”.
- Maybelline color sensational powder matte lipstick.
-
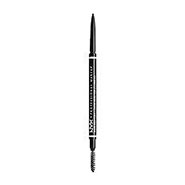
Brows
- Use the brow pencil to outline the top and bottom of the brows and fill in the tail. The brows should be darkest at the tail and fading as they reach the center./li>
- Any black color.
- NYX micro brow pencil.
-

Mascara
- Apply a light layer to the top and bottom lashes./li>
- Any black color.
- Maybelline the rocket mascara (waterproof).
-
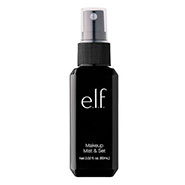
Setting Spray (optional)
- This is the last step on makeup application. It helps to keep all the makeup in place and helps remove any powdery look. It also is a nice refreshing mist after long performances.
- No color selection.
- Elf makeup mist and set.
-
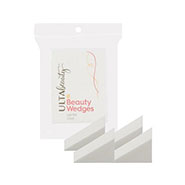
Tools
- We recommend purchasing a large set of sponge wedges. A set of about 10 can be purchased for a few dollars. You can use each sponge a few times but after 3-5 Hayes, we reccomend throwing them away.
-
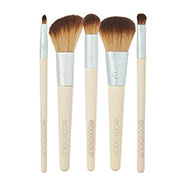
Brushes
- Brushes are a great one-time investment. They are great for powder, blush and eyeshadow application. We recommend cleaning the brushes with soapy water after 3-5 uses. The brand is not so important, but find a set that had a variety of sizes. Choose a set that has at least 3 different sized brushes but the more you have the better. I like the real techniques and ecotools brands. Don’t buy brushes that are too cheap as they will waste a lot of the makeup and will be very rough on the skin.
- Ecotools stay matte and beautiful set.